Table of Contents
- Adding documents
- Downloading documents and folders
- Creating folders
- Copying documents and folders
- Moving documents and folders
- Deleting documents and folders
- Renaming documents and folders
- Getting Information on an image
- The public_html folder (for students only)
What is Dolphin Files?
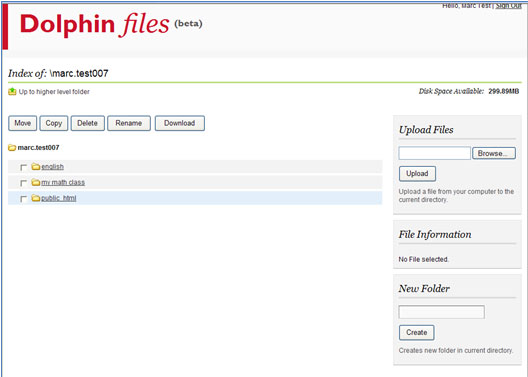
Dolphin Files is a web based repository for documents and images, that allows students and employees to store files and retrieve them from any web browser. This folder of files can also be accessed via a campus computer though a user’s shared network drive. The following image is a display of the features that are available in Dolphin Files.
Adding documents
Adding a document (also called uploading a file) is done by clicking on the Browse button located on the right side of the page. A dialog box will open up which allows you to choose the document you wish to upload. The system will accept text files, images, and zipped folders. There are limitations:
- You may not upload a file larger than 50 MB via Dolphin Files. If you need to upload large files please use an SFTP client as described in the CI Guide to Accessing Student Web Space
- Your total student storage space (including all web site documents) is limited to a maximum of 300 MB
Once you have located the file you wish to add, click the Upload button.
Downloading documents and folders
Downloading a document or folder to your computer is accomplished by clicking on the box to the left of the object you wish to download, and clicking on the Download button located above the list of objects in your Dolphin Files.
If you choose to download a folder or multiple files, the system will automatically create a zip file for you . You may not download files larger than 50 MB via Dolphin Files. If you are downloading multiple files or directories as a zip file, the total amount to download cannot be larger than 50 MB. If you need to download large files please use an SFTP client as described in the CI Guide to Accessing Student Web Space.
Creating folders
Creating a folder is accomplished by typing in the name of the file you wish to create, in the lower right side of the page. Once you have typed the name in the text box, click on the Create button. The new folder will be created in whichever folder your Dolphin Files is currently opened.
Copying documents and folders
Click in the checkbox to the left of the document or folder you wish to copy. A new page will be displayed that provides you with a choice as to what the destination folder of the selected files will be. Click in the button located next to the folder you wish to copy the selected files into.
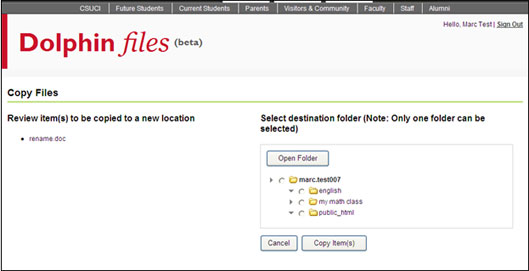
After you have completed the copying, the folder into which the document was copied will be displayed.
Moving documents and folders
Click in the checkbox to the left of the document or folder you wish to move. A new page will be displayed that provides you with a choice as to what the destination folder of the selected files will be. Click in the button located next to the folder you wish to move the selected files into.
Deleting documents and folders
Deleting a document or folder is accomplished by clicking on the box to the left of the object you wish to delete, and clicking on the Delete button located above the list of objects in your Dolphin files.
Renaming documents and folders
Renaming a document or folder is accomplished by clicking on the box to the left of the object you wish to rename, and clicking on the Rename button located above the list of objects in your Dolphin Files. A new page will be displayed that displays the current name of the document and the new name of the document. Click on the Rename button located below the new name of the document or folder.
Getting File Information on an Image
Click in the checkbox to the left of the image you wish to get more information on... A thumbnail of the image will appear in the selected files information pane on the right of the page. This pane also contains information about the image such as the name, file size, type of file, date of creation, and the location of the image in Dolphin Files. Users without Javascript enabled can see a file’s info by selecting that file and pressing the “File Info” button
The public_html folder (for students only)
The "public_html" folder is a special folder in that any documents within this folder can be accessible via the World Wide Web. NOTE: confidential or sensitive information should not be stored in the "public_html" folder, as it is viewable by the general public. More information on student web sites can be found in the CI Guide to Accessing Student Web Space.